
How to Replace or Clean | Range Hood Filters?
Keeping your range hood filters clean or replaced is essential to maintaining a healthy kitchen environment. Whether it’s grease filters or charcoal filters, regular maintenance ensures your range hood works effectively, improving air quality and keeping odors at bay. If you run into issues beyond basic cleaning or replacing filters, don’t hesitate to contact professional service.
How to Replace or Clean Range Hood Filters?
Cooking in a kitchen should be a rewarding experience, but a malfunctioning range hood can quickly turn it into a frustrating one. A range hood filter that’s clogged or dirty can affect everything from air quality to your hood’s efficiency, leaving you with lingering odors or poor ventilation. Whether you’ve noticed grease buildup, odors that won’t go away, or your range hood simply isn’t performing as it should, dirty or damaged filters are often the culprit.
By learning how to properly replace or clean range hood filters, you can save yourself time, money, and the hassle of dealing with inefficient kitchen appliances. Regular maintenance ensures your range hood performs its best—keeping your kitchen fresh, breathable, and pleasant to cook in.
Your fridge is a kitchen superstar as it keeps all your food fresh and drinks cold.
But does the fridge feel warm when you open it?
Is there water all over the floor?
Fridge issues are the worst!
Common Range Hood Filter Issues
Range hood filters are designed to trap grease, smoke, and odors, but over time, they can become clogged or damaged. Common issues include:
- Clogged Filters: Overuse without cleaning leads to grease buildup, reducing airflow and trapping unwanted odors.
- Damaged Filters: Filters may become bent, warped, or corroded, compromising their ability to filter out contaminants.
- Inefficient Charcoal Filters: In ductless models, charcoal filters absorb odors but need regular replacement, typically every 3-4 months.
By addressing these issues regularly, you can keep your kitchen air clean and your range hood running efficiently.
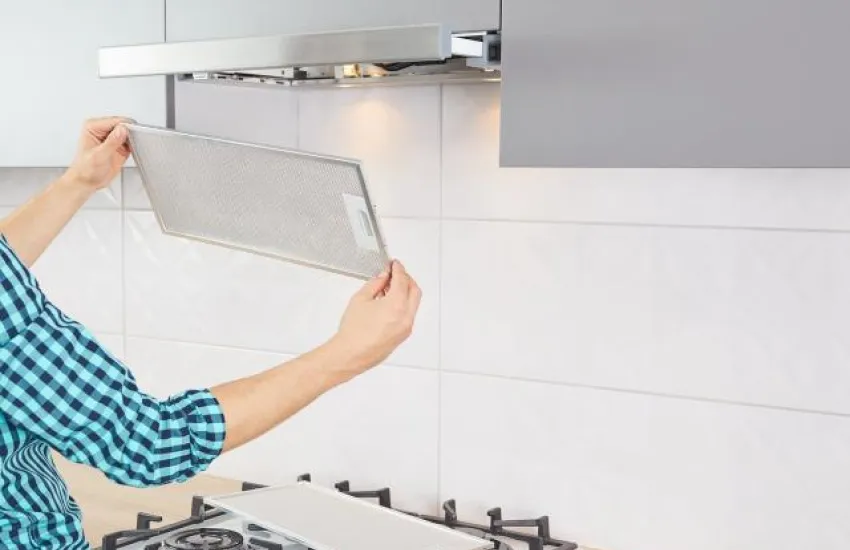
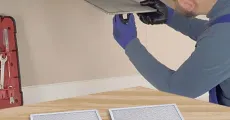
How to Replace Grease Filters
Grease filters, often made from stainless steel or aluminum mesh, are essential for trapping grease and food particles. Here’s how to replace them:
Steps for Replacing Grease Filters
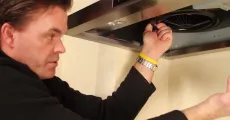
- Turn Off Power: Always unplug the range hood or disconnect the power at the breaker box to ensure safety.
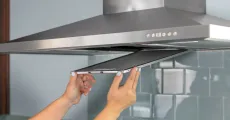
- Open the Range Hood Panel: This may require unscrewing or removing the cover.
- Remove the Old Filter:
- For most models, filters pop out when pulled downward.
- Some slide out horizontally, and baffled filters may need tilting before removal.
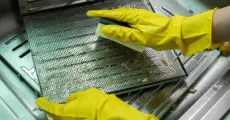
- Inspect for Damage: Check for dents, corrosion, holes, or warping in the filter.
- Replace with a New Filter: If the filter is damaged, replace it with a new one of the same type and size.
- Install the New Filter: Ensure the new filter is properly secured and aligned.
When to Replace
Grease filters should be replaced every 3-6 months, depending on cooking frequency and grease buildup.
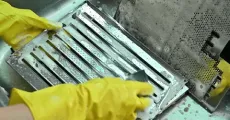
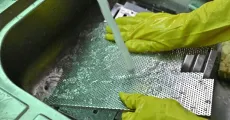
How to Clean Reusable Grease Filters
Reusable filters can be cleaned and put back into service, extending their lifespan. Follow these steps:
Cleaning Process
- Soak in Hot Water: Fill a sink or basin with hot water and add degreasing dish soap.
- Soak the Filter: Submerge the filter for 10-15 minutes to loosen grease.
- Scrub with a Soft Brush: Use a soft brush to scrub off grease and debris.
- Rinse Thoroughly: Rinse the filter with hot water until all soap residue is removed.
- Air Dry: Let the filter dry completely before reinstalling it.
Maintenance Tips
Clean reusable grease filters every 3-4 months to maintain peak performance and prevent excessive grease buildup.
How to Replace Charcoal Filters (for Ductless Systems)
Charcoal filters are used in ductless range hoods to absorb odors. Here’s how to replace them:
- Locate the Charcoal Filter: Open the range hood to access the filter(s), typically found between the fan and intake.
- Remove the Old Filter: Slide or pull out the old charcoal filter(s).
- Install the New Filter: Place the new charcoal filter in the same spot, ensuring it’s securely in place.
Replace charcoal filters every 3-4 months for optimal odor control.
Additional Maintenance Tips
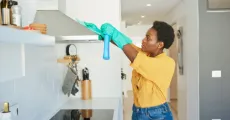
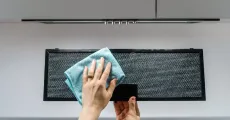
- Clean the Interior of the Range Hood: Wipe down fan blades and internal components with a degreaser or soapy water.
- Tackle Stubborn Grease: Use a paste of baking soda and water to scrub stubborn grease.
- Dry Components Thoroughly: Always dry components before reassembling them to prevent moisture damage.


Your Decision
While regular cleaning and maintenance can address most filter issues, sometimes you may encounter more serious problems that require professional attention. If you notice persistent smells, unusual noises, or a lack of airflow even after cleaning or replacing the filters, it might be time to call in a professional. Contact CLT Appliance Repair today for expert diagnosis and repairs on your kitchen range hood repair system today.
FAQs
Replace grease filters every 3-6 months, depending on usage. If the filter is reusable, clean it every 3-4 months.
No, charcoal filters are typically non-reusable. They need to be replaced every 3-4 months.
If your range hood isn’t functioning properly after cleaning or replacing filters, it could be an issue with the motor, fan, or other components. It’s best to consult a professional for further inspection.
Check for visible damage like dents or holes, or if cleaning no longer restores the filter’s performance. If it’s heavily clogged and cleaning doesn’t work, it’s time for a replacement.
Noises can be caused by loose components, a failing motor, or issues with the fan. Tighten screws, check the motor bearings, and inspect the fan blades for damage.
Don't let a malfunctioning Range Hood disrupt your daily life. Contact CLT Appliance Repair today at 704-606-9043 to schedule your Range Hood repair service.
We'll have your Range Hood back to optimal performance in no time!.