
How to Fix | Common Installation Problems?
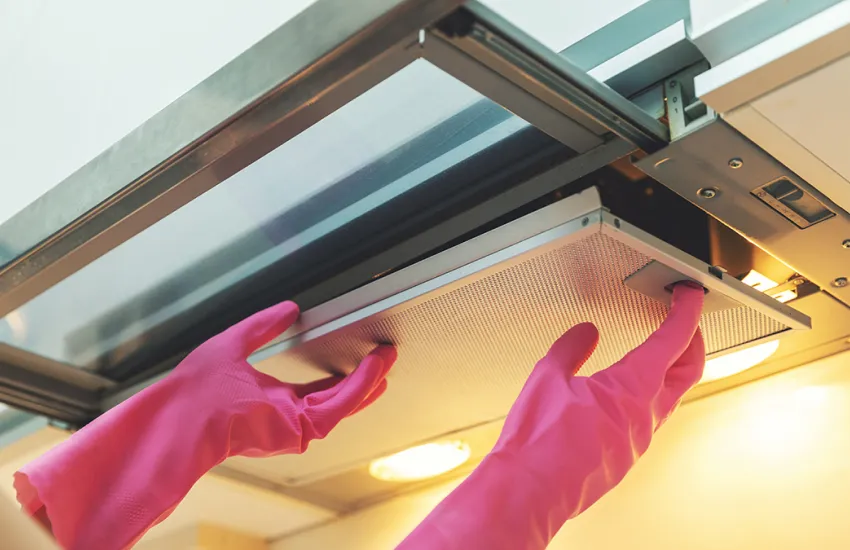
Improper range hood installation can lead to performance issues and safety hazards, including restricted airflow from the wrong duct size, inefficient venting, or electrical malfunctions. Problems like inadequate support, incorrect exhaust placement, obstructed ducts, and improper mounting height can reduce efficiency and cause long-term damage. To ensure your range hood works optimally, it’s crucial to follow manufacturer guidelines, secure proper support, and inspect for blockages.
How to Fix Common Installation Problems?
Installing a range hood should be the final step in perfecting your dream kitchen, but for many, it becomes a source of frustration. From the wrong duct size to improper support and noisy operation, these seemingly small mistakes can drastically reduce your hood’s performance. A poorly installed range hood won’t just underperform but it can cause safety hazards, from electrical issues to moisture buildup in improperly vented ducts.
Your fridge is a kitchen superstar as it keeps all your food fresh and drinks cold.
But does the fridge feel warm when you open it?
Is there water all over the floor?
Fridge issues are the worst!
Common Range Hood Installation Problems
1. Improper Duct Size and Type
- Problem: Using ducts that are too small or flexible reduces airflow and causes overheating.
- Solution: Follow the manufacturer’s guidelines for duct size and opt for rigid ducts for better performance. Flexible ducts should only be used when absolutely necessary and kept to a minimum length.
2. Inadequate Support
- Problem: Mounting the hood on drywall alone risks it becoming loose or falling.
- Solution: Secure the hood to structural beams or add a cross-brace using 2x4s or plywood for stability.
3. Incorrect Exhaust Location
- Problem: Venting into an attic or enclosed space leads to moisture buildup and back-pressure issues.
- Solution: Always vent directly outdoors and ensure compliance with local building codes to avoid structural damage or health risks.
4. Improper Installation Height
- Problem: Mounting the hood too high reduces its effectiveness, while too low may be unsafe.
- Solution: Install the hood 28-36 inches above the cooktop and follow the manufacturer’s recommendations for the specific model.
5. Obstructed Ductwork
- Problem: Blockages from bird nests, grease, or debris can severely reduce suction power.
- Solution: Inspect ducts regularly and keep runs straight and short to maximize airflow. Clean grease buildup to maintain performance.
6. Loose Connections
- Problem: Vibrations over time can loosen screws and duct connections, causing noise and inefficiency.
- Solution: Tighten all screws, brackets, and duct joints. Use high-quality sealing tape for airtight ductwork.
7. Electrical Issues
- Problem: Faulty wiring or improper grounding can lead to malfunctions or safety hazards.
- Solution: Verify proper grounding and ensure the circuit matches the hood’s voltage and amperage requirements. Tighten loose wires and check connections with a multimeter.
DIY Solutions for Installation Problems
- Verify Measurements: Check the manufacturer’s specifications for duct size, mounting height, and exhaust placement.
- Inspect Ducts: Clean out blockages before installation and ensure ducts are properly aligned.
- Secure Mounting: Use a stud finder to locate beams or install a brace for drywall support.
- Test Wiring: Confirm that wires are properly grounded and connected to prevent malfunctions.
If any of these steps feel beyond your expertise, professional help is essential to avoid costly mistakes.
Preventing Future Installation Mistakes
- Follow Guidelines: Always refer to the manufacturer’s instructions and local building codes.
- Invest in Quality Materials: Use rigid ducts, strong mounting hardware, and certified electrical components.
- Regular Inspections: Schedule periodic checks to ensure ductwork is clean and connections remain secure.
- Hire Professionals: For complex setups, let experts handle the installation to save time and ensure safety.
When to Call a Professional
If your range hood installation involves complex wiring, duct rerouting, or unclear specifications, it’s best to hire a professional. Poorly installed hoods can result in reduced performance, safety hazards, or long-term damage to your home. The experts at CLT Appliance Repair ensure your installation is safe, efficient, and fully compliant with local codes. With our expertise, you can avoid costly errors and enjoy a flawlessly installed range hood. Contact now for expert range hood repair!
FAQs
The noisy operation often results from loose screws, obstructions in the ductwork, or improper mounting. Tighten screws and inspect ducts for debris.
No. Venting into the attic can lead to moisture buildup, mold, and structural damage. Always vent directly outdoors.
Range hoods should typically be installed 28-36 inches above the cooktop for optimal performance.
Ensure the duct size matches the manufacturer’s specifications, clean filters, and check for blockages in the ductwork.
If you’re unsure about wiring, ductwork, or support requirements, hiring a professional ensures a safe, effective installation.
Don't let a malfunctioning Range Hood disrupt your daily life. Contact CLT Appliance Repair today at 704-606-9043 to schedule your Range Hood repair service.
We'll have your Range Hood back to optimal performance in no time!.