
How to Diagnose and Repair Control Panel Problems in | Range Hood?

When your range hood’s control panel stops responding, it can be frustrating and disruptive to your kitchen routine. Common issues include unresponsive buttons, display malfunctions, and inconsistent operation. This guide provides you with step-by-step instructions on diagnosing and repairing control panel issues, from basic visual inspections to using multimeters for precise tests.
How to Diagnose and Repair Control Panel Problems in Range Hood?
Imagine standing in the kitchen, ready to cook a delicious meal, only for your range hood to refuse to turn on, flicker, or go haywire as you adjust the settings. That frustrating moment when the buttons on your control panel seem to have a mind of their own or worse, stop responding entirely.
The control panel is the brain of your range hood, managing everything from the fan speed to the lighting. When it malfunctions, you’re left with more than just a messy kitchen as you’re dealing with a potentially expensive repair. But before you pick up the phone and call for professional help, let’s get to know how to diagnose and repair those pesky control panel issues.
Your fridge is a kitchen superstar as it keeps all your food fresh and drinks cold.
But does the fridge feel warm when you open it?
Is there water all over the floor?
Fridge issues are the worst!
Identifying Common Control Panel Issues
When your range hood control panel starts acting up, the first step is to recognize the symptoms. These are the most common signs of a failing control panel:
1. Unresponsive Buttons or Touchpads
One of the most obvious signs of a malfunctioning control panel is when the buttons or touchpad fail to respond when pressed. This could indicate worn-out contacts, a damaged switch, or an issue with the internal connections.
2. Erratic or Inconsistent Operation
If your range hood behaves unpredictably—turning on or off without command, switching settings on its own, or not maintaining consistent fan speeds—it could be a sign of a software glitch or loose connections within the control panel.
3. Display Malfunctions
Flickering or completely blank screens are common symptoms of electrical issues affecting the display circuit. This could be caused by power surges, wiring faults, or internal component damage.
4. Unusual Noises When Pressing Buttons
Hearing odd sounds like buzzing, clicking, or static noises when interacting with the control panel may suggest electrical issues or physical damage to the internal components.
5. Incorrect Temperature or Setting Controls
If the temperature or fan settings do not respond correctly or are not aligned with what is being displayed, this could signal problems with the internal circuitry or faulty sensors.
Diagnostic Steps for Control Panel Problems
Once you’ve identified the issue, it’s time to start troubleshooting. Here’s how to go about it:
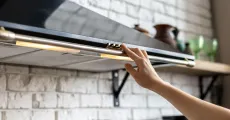
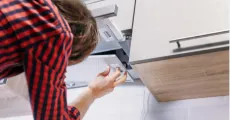
1. Perform a Visual Inspection
Start by turning off the power and visually inspecting the control panel:
- Look for visible damage: Cracks, burns, or signs of water damage could be causing the issue.
- Check for loose connections: Inspect the wiring and connectors for any signs of corrosion, fraying, or disconnection.
- Overheating signs: Look for discoloration or burn marks on the components, which could indicate overheating.
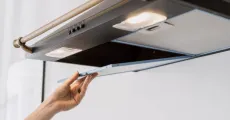
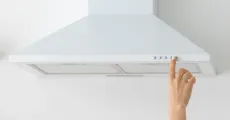
2. Test the Buttons and Controls
Once the panel is open, test each button or touchpad individually to see if there is any inconsistent or erratic behavior. If some controls respond but others don’t, the issue could be isolated to a specific switch or circuit.
3. Inspect the Power Supply
Make sure the range hood is properly plugged in, and check the power cord for visible damage. Test the outlet with another device to ensure it’s working. If the power supply seems faulty, try using a different outlet or replacing the power cord.
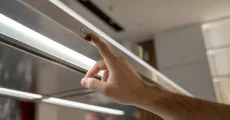
4. Examine Internal Components
With the power off, remove the control panel cover. Look for any loose wires or signs of damage, such as burnt components, moisture buildup, or corrosion. This is a good time to clean out any dust or debris, which can contribute to malfunctioning.
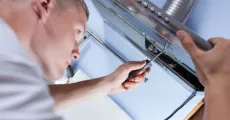
5. Use a Multimeter
- Test button continuity: Use a multimeter to test the continuity of the buttons and switches. If any of them show no continuity when pressed, they need to be replaced.
- Voltage checks: Check the voltage at various connection points to make sure power is flowing properly.
- Sensor resistance: Test the sensors and thermostats for proper resistance readings. If the resistance is off, they may need to be replaced.
Common Causes and Solutions
Now that you’ve identified the problem, let’s explore common causes and how to address them:
1. Electrical Surges
Power surges can cause damage to internal components like capacitors or resistors.
- Solution: Replace any damaged parts. Consider installing a surge protector to prevent future damage.
2. Moisture Damage
Moisture buildup inside the control panel can cause corrosion and short-circuiting.
- Solution: Dry out the control panel thoroughly. Replace any corroded components and improve ventilation or seal the entry points for moisture.
3. Worn-Out Components
Over time, buttons, switches, or sensors may wear out and fail to work properly.
- Solution: Replace faulty components such as buttons, switches, or sensors. You can clean contact points with an electronic cleaner to improve response.
4. Software Glitches
Sometimes, control panels may simply be suffering from a software glitch or a firmware issue.
- Solution: Perform a factory reset if possible. If the issue persists, check if there is a firmware update available for your model.
5. Loose Connections
Loose or disconnected wires can cause intermittent control panel failures.
- Solution: Reseat or re-solder any loose wires. Tighten screws and connectors to ensure everything is secure.
Repair Tips
When performing control panel repairs, always follow these tips to ensure a safe and successful repair:
- Turn off the power: Always unplug the appliance before beginning any repairs to prevent electrical shock or damage.
- Use the right tools: Use appropriate tools for the job, including screwdrivers, multimeters, and electronic cleaners.
- Clean connections: Use compressed air to clean dust and debris from the control panel and internal components.
- Apply dielectric grease: This helps prevent future corrosion on connections.
- Replace the entire control board: If multiple components are damaged, it might be more cost-effective to replace the entire control board.
When to Seek Professional Help
While many control panel problems can be resolved through DIY troubleshooting, there are situations where professional help is required:
- Lack of tools or expertise: If you don’t have the necessary tools or experience to handle electrical repairs safely, it’s best to consult a professional.
- Complex circuitry issues: If the problem involves complex electronics, such as the control board or motor connections, professional assistance may be necessary.
- Specialized parts: Some control panels require specialized parts that are not easily available.
- Warranty coverage: If your range hood is still under warranty, it’s advisable to have repairs handled by an authorized technician.
CLT Appliance Repair specializes in diagnosing and fixing control panel issues quickly and efficiently. Contact us today for a thorough inspection and expert range hood repair.
FAQs
This could be due to faulty switches, loose connections, or a malfunctioning control board. Perform a visual inspection, test the buttons, and check for power issues.
A flickering display might be caused by power surges, damaged wiring, or a failing control board. Check for loose connections, inspect the wiring, and consider replacing the display if needed.
Fan speed issues are often due to worn-out switches, faulty sensors, or a problem with the control board. Test the switches and sensors to see if they are functioning correctly.
Repairing a control board is complex and requires specific knowledge of the system. If you’re not experienced, it’s safer to have a professional handle the repair to avoid causing more damage.
Don't let a malfunctioning Range Hood disrupt your daily life. Contact CLT Appliance Repair today at 704-606-9043 to schedule your Range Hood repair service.
We'll have your Range Hood back to optimal performance in no time!.
