
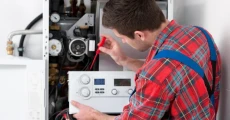
How to diagnose and repair | motor problems in heaters?

Check out the easy DIY solutions for the common heater and furnace issues. This comprehensive guide covers everything from thermostat problems to blower motor maintenance, helping you keep your home warm and cozy. Know when to tackle repairs yourself and when to call in the professionals.
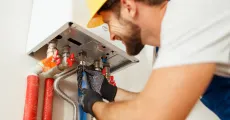
How to diagnose and repair motor problems in heaters?
When your heater starts making strange noises or stops working altogether, the motor could be the culprit. Understanding how to diagnose and repair motor problems can save you time and money. Let’s explore the common issues and their solutions.
Your fridge is a kitchen superstar as it keeps all your food fresh and drinks cold.
But does the fridge feel warm when you open it?
Is there water all over the floor?
Fridge issues are the worst!
Signs of Motor Problems: Know the Warning Signals
Your heater’s motor will often give you warning signs before completely failing:
- Unusual noises like squealing, grinding, or humming
- Intermittent operation or frequent shutdowns
- Excessive vibration during operation
- Burning smells coming from the unit
- Higher than normal energy bills
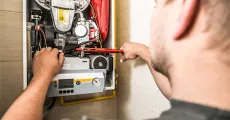
Basic Motor Diagnostics: Your First Steps
Before diving into repairs, let’s check the basics:
- Listen carefully to identify the type and location of unusual sounds
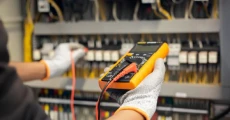
- Check for proper voltage at the motor terminals
- Inspect the capacitor for signs of bulging or leaking
- Test motor rotation by hand when the unit is off
- Verify that all electrical connections are tight
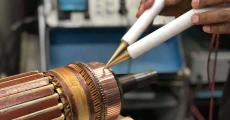
Motor Capacitor Issues: The Silent Killer
A faulty capacitor is often behind motor problems:
- Look for a swollen or deformed capacitor casing
- Check for oil leakage around the capacitor
- Use a multimeter to test capacitor functionality
- Replace capacitors showing any signs of wear
- Always discharge capacitors before handling them
Bearing Problems: When Smooth Turns Rough
Worn bearings can cause serious motor damage:
- Clean and lubricate bearings according to manufacturer specifications
- Listen for grinding or squealing sounds
- Check for shaft play or wobble
- Replace bearings at first signs of wear
- Consider the motor’s age when deciding between repair and replacement
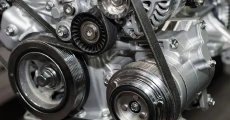
Belt Drive Maintenance: Keeping Things Moving
For belt-driven motors, proper maintenance is crucial:
- Check belt tension regularly
- Look for signs of wear or fraying
- Ensure proper pulley alignment
- Replace belts showing significant wear
- Clean pulleys of debris and dust
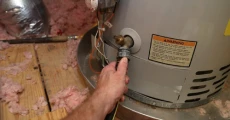
Electrical Troubleshooting: Power Problems
Electrical issues can masquerade as motor problems:
- Test voltage at all connection points
- Inspect wiring for signs of damage or burning
- Check all terminal connections
- Verify proper grounding
- Monitor amperage draw during operation
Motor Overheating: Keeping Your Cool
Overheating can quickly destroy a motor:
- Clear any debris blocking airflow
- Check for proper ventilation
- Verify the correct voltage supply
- Inspect thermal overload protection
- Monitor motor temperature during operation
Professional Repair vs. Replacement
Know when to call in the experts:
- Consider the motor’s age and repair history
- Compare repair costs to replacement
- Factor in energy efficiency improvements
- Check warranty coverage
- Evaluate long-term reliability needs
Preventive Maintenance: Avoiding Future Problems
Regular maintenance can prevent most motor issues:
- Schedule regular inspections
- Keep motors clean and well-ventilated
- Maintain proper lubrication
- Monitor performance metrics
- Document all maintenance activities
Safety First: Important Precautions
Always prioritize safety when working with motors:
- Disconnect power before any repairs
- Use proper safety equipment
- Follow manufacturer guidelines
- Document all work performed
- Know your limitations
Emergency Procedures
When immediate action is needed:
- Shut down the system safely
- Disconnect power at the source
- Document symptoms and observations
- Contact qualified technicians
- Secure the area if necessary
Expert Tips for Motor Longevity
- Keep detailed maintenance records
- Use quality replacement parts
- Follow manufacturer specifications
- Monitor performance trends
- Plan for eventual replacement


The Bottom Line
While understanding motor problems and their solutions is valuable for any homeowner, knowing when to step back and call professionals is equally important. Regular maintenance and early problem detection can significantly extend your heater motor’s life and prevent costly emergency repairs. Keep this guide handy for basic troubleshooting, but remember that your safety should always come first.
Looking for emergency heating repair in charlotte nc? CLT Appliance Repair’s 24/7 emergency service team is just a phone call away. We pride ourselves on fast response times and transparent pricing, making us Charlotte’s most trusted name in appliance repair.
FAQs
Annual professional inspections are essential, ideally before the heating season begins.
Evacuate immediately, don’t touch electrical switches, and call your gas company from outside the building.
It’s not recommended. If you must use one, ensure it has tip-over protection and keep it away from flammable materials.
Test monthly using the test button and replace batteries twice yearly. Replace the entire unit according to manufacturer guidelines.
Maintain at least three feet of clearance around all heating equipment.
Don't let a malfunctioning Heater disrupt your daily life. Contact CLT Appliance Repair today at 704-606-9043 to schedule your Heater repair service.
We'll have your Heater back to optimal performance in no time!
Dryer Repair Charlotte NC | Washing Machine Repair Charlotte NC | Refrigerator Repair Charlotte NC | Microwave Oven Repair Charlotte NC | Freezer Repair Charlotte NC | Dryer Vent Cleaning Charlotte NC | Dishwasher Repair Charlotte NC | Cooktop Repair Charlotte NC | Stove Repair Charlotte NC | Charlotte Ice Maker Repair | Garbage Disposal Repair Charlotte NC | Plumbing Repair Charlotte NC | Water Heater Repair Charlotte NC
Admiral Appliance Repair | Amana Appliance Repair | Bosch Appliance Repair | Electrolux Appliance Repair | Frigidaire Appliance Repair | General Electric Appliance Repair | Haier Appliance Repair | Hotpoint Appliance Repair | Jenn-Air Appliance Repair | Kenmore Appliance Repair | KitchenAid Appliance Repair | LG Appliance Repair | Magic Chef Appliance Repair | Maytag Appliance Repair | Roper Appliance Repair | Samsung Appliance Repair | Speed Queen Appliance Repair | Whirlpool Appliance Repair | Dacor Appliance Repair | Viking Appliance Repair | Thermador Appliance Repair | Sub-Zero Appliance Repair | Wolf Appliance Repair | Monogram Appliance Repair | Bertazonni Appliance Repair | BlueStar Appliance Repair | Thor Appliance Repair | Miele Appliance Repair | Cafe Appliance Repair | GE Appliance Repair
Freezer Repair Indian Land SC | Freezer Repair Indian Trail NC | Freezer Repair Pineville NC | Freezer Repair Rock Hill SC | Freezer Repair Belmont NC | Freezer Repair Matthews NC | Freezer Repair Lancaster SC | Freezer Repair Cornelius NC | Freezer Repair Fort Mill SC | Freezer Repair Concord NC | Freezer Repair Denver NC | Freezer Repair Monroe NC | Freezer Repair Mooresville NC | Freezer Repair Harrisburg NC | Freezer Repair Lake Wylie SC | Freezer Repair Huntersville NC | Freezer Repair Kannapolis NC | Freezer Repair Mint Hill NC | Freezer Repair Waxhaw NC | Freezer Repair Troutman NC | Freezer Repair Davidson NC | Freezer Repair Gastonia NC | Freezer Repair Charlotte NC
