
Pilot Light Problems? Expert Guide to Fix or Replace Your Heater's Pilot Light
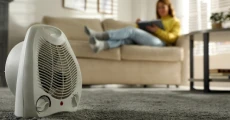
When your pilot light goes out or malfunctions, it can leave you in the cold. This comprehensive guide walks you through understanding pilot light systems, safe troubleshooting steps, and proper maintenance procedures. From relighting techniques to replacement options, learn how to handle pilot light issues effectively and safely.
How to fix or replace a pilot light?
A functioning pilot light is crucial for your gas heating system’s operation. When this small but mighty flame goes out or starts misbehaving, it can shut down your entire heating system, leaving you and your family in the cold. While pilot light issues are common, especially in older heating systems, many homeowners feel uncertain about handling these problems themselves. The good news is that with proper understanding and careful attention to safety, you can often resolve pilot light issues without an emergency service call.
However, it’s essential to approach any gas appliance maintenance with caution and knowledge. This guide will help you understand when you can safely handle pilot light problems yourself and when it’s time to call in the professionals. We’ll walk you through everything from basic troubleshooting to maintenance procedures, ensuring you can make informed decisions about your heating system’s care and maintain your family’s comfort throughout the cold season.
Your fridge is a kitchen superstar as it keeps all your food fresh and drinks cold.
But does the fridge feel warm when you open it?
Is there water all over the floor?
Fridge issues are the worst!
Understanding Your Pilot Light System
What Is a Pilot Light?
A pilot light is a small, continuous flame that ignites the main burner in your gas heating system. This seemingly simple component plays a vital role in your heater’s operation, working in conjunction with a thermocouple – a safety device that shuts off the gas if the pilot light goes out. Think of your pilot light as a faithful guardian, standing ready 24/7 to ensure your heating system springs into action whenever needed. The thermocouple acts as a safety supervisor, monitoring the pilot light and preventing dangerous gas leaks if the flame extinguishes.
Common Pilot Light Problems
Most pilot light issues stem from basic problems that develop over time. A properly functioning pilot light burns with a steady, bright blue flame. When you notice changes in the flame’s color, size, or stability, it often indicates a specific issue that needs attention. Dirty components can restrict gas flow, while drafts or ventilation problems might repeatedly extinguish the flame. In some cases, a faulty thermocouple fails to detect the flame properly, shutting down the gas supply even when the pilot is lit.
Safe Troubleshooting Steps
Before You Begin
Safety must always come first when working with gas appliances. Before attempting any pilot light maintenance, ensure your work area is well-ventilated. If you detect even the slightest smell of gas – often described as a rotten egg odor – stop immediately, leave the area, and contact your gas company. This isn’t a situation for DIY solutions.
Basic Inspection Process
Start with a visual inspection of your pilot light area. A properly functioning pilot light should have a steady, blue flame that indicates complete combustion. During your inspection, pay attention to these key areas:
- The pilot light flame (should be blue and steady)
- The surrounding area (check for soot or debris)
- The gas supply valve position
- The thermocouple connection
Look for any signs of soot or carbon buildup around the pilot light opening, as these can indicate combustion problems that need professional attention.
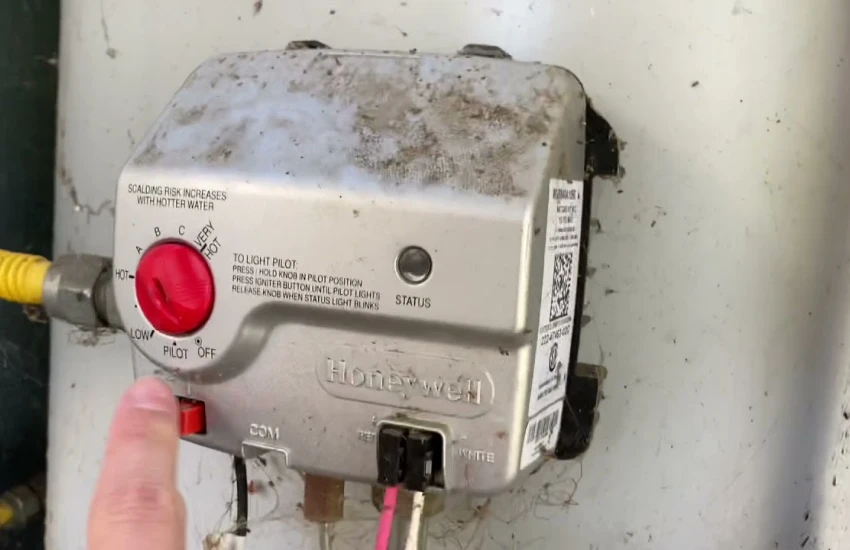
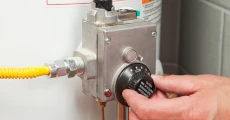
Relighting Your Pilot Light
When your pilot light goes out, relighting it properly is crucial for safe operation. First, locate your pilot light assembly and gas valve. Turn the gas valve to the “OFF” position and wait 5-10 minutes for any residual gas to dissipate. Once it’s safe, set the valve to “PILOT” and hold down the reset button while lighting the pilot. Continue holding the reset button for about one minute to ensure the thermocouple warms up properly. When you release the button slowly, the flame should stay lit, allowing you to turn the valve to “ON.”
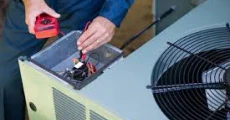
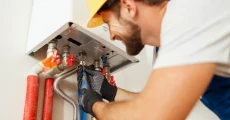
Cleaning and Maintenance
Regular maintenance of your pilot light system is essential for reliable operation. Over time, dust and debris can accumulate in the pilot light opening, affecting the flame quality and stability. Professional cleaning ensures all components function correctly and safely. During maintenance, technicians will clean the pilot light opening, adjust the flame height if necessary, and verify the thermocouple is responding properly.
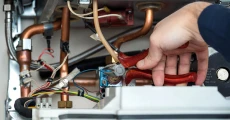
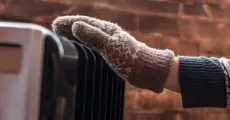
Replacement Considerations
Consider replacing your pilot light assembly if you experience frequent outages despite regular cleaning, notice a persistently yellow or orange flame, or see signs of damage or corrosion. Many newer heating systems use electronic ignition instead of standing pilot lights, offering improved efficiency and reliability. During your next heating system upgrade, discussing these modern alternatives with your HVAC professional could lead to significant energy savings.
Safety First
Your safety is paramount when dealing with gas appliances. Never attempt DIY repairs if you notice any of these warning signs:
- Gas odors (rotten egg smell)
- Sooty residue around the pilot assembly
- Unusual popping or banging sounds
- Carbon monoxide detector alerts
- Yellow or flickering pilot light flame
These warning signs indicate potentially dangerous conditions that require expert attention.
The Bottom Line
Proper pilot light maintenance is crucial for your heating system’s efficiency and safety. While some issues can be resolved with careful attention to maintenance and proper relighting procedures, always there on the side of caution when dealing with gas appliances.
Trust CLT Appliance Repair for expert pilot light service and replacement. Our factory-trained technicians carry genuine replacement parts and advanced testing equipment to ensure your pilot light system functions safely and efficiently. With our upfront pricing and same-day heater repair charlotte service, you’ll have peace of mind knowing your heating system is in good hands.
FAQs
A yellow flame indicates incomplete combustion, often due to dirt or improper air-to-gas mixture ratios. Professional adjustment may be needed.
Standing pilot lights typically consume about $7-11 worth of gas per month when operating continuously.
Yes, strong drafts, extreme temperature changes, and high humidity can all affect pilot light performance.
Electronic ignition systems can reduce gas consumption by 30% or more annually, making them a cost-effective upgrade for many homeowners.
Thermocouples typically last 2-5 years, though this can vary based on usage and maintenance.
Don't let a malfunctioning Heater disrupt your daily life. Contact CLT Appliance Repair today at 704-606-9043 to schedule your Heater repair service.
We'll have your Heater back to optimal performance in no time!
Dryer Repair Charlotte NC | Washing Machine Repair Charlotte NC | Refrigerator Repair Charlotte NC | Microwave Oven Repair Charlotte NC | Freezer Repair Charlotte NC | Dryer Vent Cleaning Charlotte NC | Dishwasher Repair Charlotte NC | Cooktop Repair Charlotte NC | Stove Repair Charlotte NC | Charlotte Ice Maker Repair | Garbage Disposal Repair Charlotte NC | Plumbing Repair Charlotte NC | Water Heater Repair Charlotte NC
Admiral Appliance Repair | Amana Appliance Repair | Bosch Appliance Repair | Electrolux Appliance Repair | Frigidaire Appliance Repair | General Electric Appliance Repair | Haier Appliance Repair | Hotpoint Appliance Repair | Jenn-Air Appliance Repair | Kenmore Appliance Repair | KitchenAid Appliance Repair | LG Appliance Repair | Magic Chef Appliance Repair | Maytag Appliance Repair | Roper Appliance Repair | Samsung Appliance Repair | Speed Queen Appliance Repair | Whirlpool Appliance Repair | Dacor Appliance Repair | Viking Appliance Repair | Thermador Appliance Repair | Sub-Zero Appliance Repair | Wolf Appliance Repair | Monogram Appliance Repair | Bertazonni Appliance Repair | BlueStar Appliance Repair | Thor Appliance Repair | Miele Appliance Repair | Cafe Appliance Repair | GE Appliance Repair
Freezer Repair Indian Land SC | Freezer Repair Indian Trail NC | Freezer Repair Pineville NC | Freezer Repair Rock Hill SC | Freezer Repair Belmont NC | Freezer Repair Matthews NC | Freezer Repair Lancaster SC | Freezer Repair Cornelius NC | Freezer Repair Fort Mill SC | Freezer Repair Concord NC | Freezer Repair Denver NC | Freezer Repair Monroe NC | Freezer Repair Mooresville NC | Freezer Repair Harrisburg NC | Freezer Repair Lake Wylie SC | Freezer Repair Huntersville NC | Freezer Repair Kannapolis NC | Freezer Repair Mint Hill NC | Freezer Repair Waxhaw NC | Freezer Repair Troutman NC | Freezer Repair Davidson NC | Freezer Repair Gastonia NC | Freezer Repair Charlotte NC
