
Dishwasher Heating Element Woes : DIY Fixes and Replacement Guide
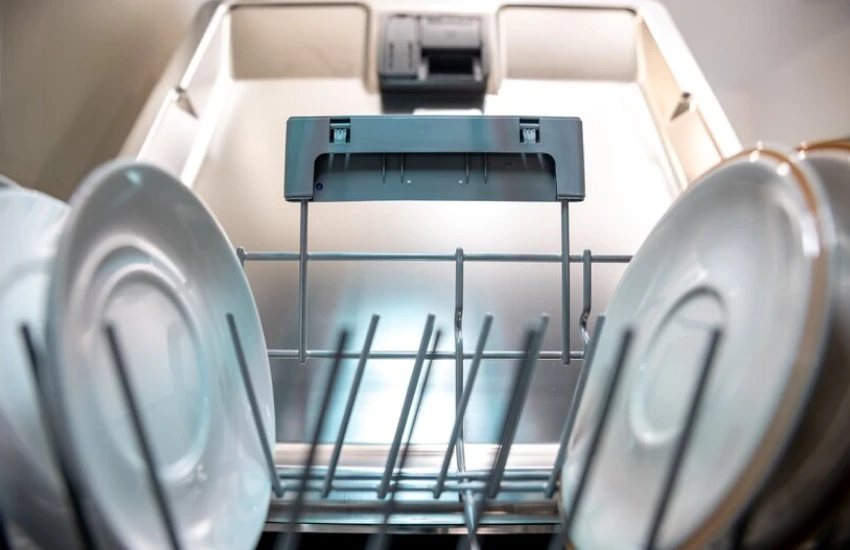
Your dishwasher runs a full cycle, you open the door, and everything inside is lukewarm, wet, and still has food stuck to it. That is usually the heating element. It is the part at the bottom of the tub that heats the wash water and helps dry your dishes at the end of the cycle. When it fails, nothing about the dishwasher works the way it should. The good news is that diagnosing and replacing a bad heating element is one of the more manageable DIY appliance repairs.
What a Failing Heating Element Looks Like
Before pulling out tools or ordering parts, confirm that the heating element is actually the issue. These symptoms point directly to it:
- Dishes come out cold and wet because the wash water never gets hot enough to dissolve detergent properly, and the heated dry cycle does nothing.
- The sanitize cycle stops working since sanitize mode requires water temperatures above 150°F, and a dead element cannot reach that threshold.
- Cycles run unusually long because some dishwashers automatically extend the cycle when water is not reaching the right temperature.
- Visible damage on the element, such as cracks, blistering, pitting, or burn marks, when you pull out the lower rack and inspect it.
Your fridge is a kitchen superstar as it keeps all your food fresh and drinks cold.
But does the fridge feel warm when you open it?
Is there water all over the floor?
Fridge issues are the worst!
Rule Out the Simple Stuff First
A bad heating element is a common cause of these symptoms, but it is not the only one. Check these things before you start taking the dishwasher apart:
- Settings and modes: Make sure heated dry and sanitize options are actually turned on. Some models default to an energy-saving or eco mode that skips the heating cycle entirely.
- Circuit breaker: A partially tripped breaker can let the dishwasher run its motor and pump while cutting power to the heating circuit. Look for error codes on the display and check whether a high limit thermostat has tripped.
- Incoming water temperature: Run the hot water at your kitchen faucet for 30 seconds before starting the dishwasher. If the water entering the machine is not already hot, the element has to work much harder. Your water heater should be set to at least 120°F.
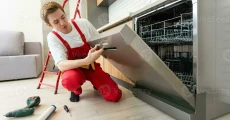
Safety Before You Touch Anything
Dishwashers run on 120V household power and are connected to both electrical and water lines. Skipping the safety steps creates a real risk of shock or flooding. Turn off the breaker that feeds the dishwasher circuit and unplug the unit if the cord is accessible under the sink. Shut off the water supply valve before pulling the dishwasher out or removing any panels. Protect your floor with towels or cardboard to prevent scratching when you slide the unit forward. Before disconnecting any wires, take photos of every connection so you can reassemble correctly.
Testing the Element With a Multimeter
A visual inspection catches obvious damage, but an element can fail electrically without looking broken. A multimeter test confirms whether the element has continuity.
Access the terminals by removing the lower front panel (also called the toe kick or kickplate). The two-element terminals poke through the bottom of the tub with wires connected to them. Disconnect at least one wire from each terminal, then set your multimeter to a low ohms range and touch one probe to each terminal.
A healthy heating element typically reads between 15 and 30 ohms, depending on the model. Here is how to interpret the results:
- Mid-range reading (15 to 30 ohms): The element is functioning, and the problem is elsewhere.
- Infinite resistance (OL on the display): The element is open and needs replacement.
- Zero or near-zero ohms: The element has shorted and needs replacement.
If the multimeter confirms failure, replacement is the next step. If you would rather skip the testing and get a definitive answer, our team at CLT Appliance Repair can diagnose it on the spot and have the part swapped the same day.
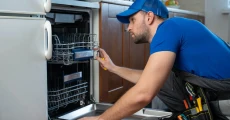
Replacing the Heating Element Yourself
This is a straightforward job that takes most homeowners 30 to 60 minutes with basic hand tools.
Getting Access
Remove the lower front panel by unscrewing the retaining screws at the bottom of the dishwasher door. If you need to pull the unit out from under the counter, disconnect the water supply line and the drain hose first. Slide the dishwasher forward carefully on the towels or cardboard you laid down earlier.
Removing the Old Element
From underneath the tub, locate the two terminal connections and the mounting hardware. Disconnect the wires (refer to the photos you took earlier). Remove the retaining nuts or clips that hold the element in place. From inside the tub, lift the old element out. Some elements have rubber gaskets or seals around the mounting holes. Note their position so you can seat the new ones correctly.
Installing the New Element
Drop the new element into position inside the tub. From underneath, seat the gaskets or seals into the mounting holes, then hand-tighten the retaining nuts. Do not overtighten. These nuts compress rubber seals, and too much force cracks them or warps the tub. Reconnect the wires to the correct terminals using your reference photos.
Testing the Repair
Slide the dishwasher back into place, reconnect the water supply and drain, and restore power at the breaker. Run a short wash cycle and check two things: that there are no leaks around the element mounting points and that the water is heating properly. Open the door mid-cycle (carefully) and feel the water temperature. If it is hot and there are no drips underneath, the job is done.
Other Parts That Cause Heating Problems
Sometimes the element tests fine, but the dishwasher still does not heat. Two other components work alongside the element and can fail independently:
- High limit thermostat: This safety device cuts power to the element if the water gets too hot. A faulty one can trip prematurely and keep the element from ever turning on. Testing it with a multimeter (checking for continuity at room temperature) confirms whether it needs replacing.
- Filters, spray arms, and inlet screens: Clogged filters restrict water flow, dirty spray arms reduce circulation, and blocked inlet screens limit how much hot water enters the tub. Cleaning all three restores the system that distributes the heat the element produces.
When DIY Is Not the Right Call
Some heating problems go beyond a straightforward element swap. Call a technician when you run into any of these situations:
- Burned or melted wiring behind the panel or at the element terminals.
- Control board faults where the board is not sending power to the element, even though the element and thermostat test fine.
- Repeated breaker trips every time the dishwasher runs a heated cycle.
- Leaks from the tub around the element mounting area that persist after gasket replacement.
For older dishwashers with multiple failing components, weigh the cost of repair against a new unit. If the dishwasher is past the 8 to 10 year mark and the repair bill approaches half the price of a replacement, a new machine is usually the smarter investment.
CLT Appliance Repair gives you an honest assessment before any work starts. If the repair does not make financial sense, we will tell you that upfront so you can put the money toward a new unit instead.
Keeping the Element Healthy Long Term
A few habits extend the life of a heating element and reduce the chance of a repeat failure:
- Use the right detergent for your water type, since hard water builds limescale on the element surface, insulating it and forcing it to overwork.
- Run a descaling product or use a water softener in hard water areas to prevent mineral buildup.
- Clean the filter and spray arms monthly so water circulates freely, and the element does not have to compensate for poor flow.
- Avoid loading dishes directly on top of the element since sustained contact causes hot spots and premature burnout.


Takeaway
A failed dishwasher heating element is one of the easier appliance problems to diagnose and fix at home. Confirming the symptoms, testing with a multimeter, and swapping the part takes under an hour for most people. When the problem turns out to be electrical wiring, a control board, or a unit that has already given its best years, professional help keeps a small issue from becoming a bigger one.
We handle dishwasher heating element repairs all the time at CLT Appliance Repair, and honestly, most of them are done in a single visit. Our guys show up in Charlotte with the common replacement parts already on the truck, so there is no waiting around for a second appointment. We price it before we start, we explain what went wrong so you understand, and we test everything before we leave. If your dishwasher is giving you cold, wet dishes and the DIY route did not get it done, that is exactly what we are here for.
FAQs
Dishes come out cold and wet after a full cycle, sanitize or heated dry options stop working, and a visual or multimeter continuity test shows cracks, blistering, or no electrical continuity through the element.
Yes, if you are comfortable turning off power and water, pulling the dishwasher out, disconnecting the element’s wires and mounting nuts, swapping in a matching replacement, and then checking for leaks and proper heating on a test cycle.
Disconnect power, access, and remove at least one wire from each terminal, set the meter to a low ohms setting, and touch the probes to both terminals. A mid-range resistance reading means the element works. Infinite or zero resistance means it is faulty and should be replaced.
The problem is usually with incoming water temperature, a tripped thermostat or safety cutoff, wiring or control board issues, or a disabled heater function that may need a reset or diagnostic cycle rather than another element replacement.
Don't let a malfunctioning dishwasher disrupt your daily life. Contact CLT Appliance Repair today at 704-606-9043 to schedule your dishwasher repair service.
We'll have your dishwasher back to optimal performance in no time!
Appliance Repair Indian Land SC | Appliance Repair Indian Trail NC | Appliance Repair Pineville NC | Appliance Repair Rock Hill SC | Appliance Repair Belmont NC | Appliance Repair Matthews NC | Appliance Repair Lancaster SC | Appliance Repair Cornelius NC | Appliance Repair Fort Mill SC | Appliance Repair Concord NC | Appliance Repair Denver NC | Appliance Repair Monroe NC | Appliance Repair Mooresville NC | Appliance Repair Harrisburg NC | Appliance Repair Lake Wylie SC | Appliance Repair Huntersville NC | Appliance Repair Kannapolis NC | Appliance Repair Mint Hill NC | Appliance Repair Waxhaw NC | Appliance Repair Troutman NC | Appliance Repair Davidson NC | Appliance Repair Gastonia NC | Appliance Repair Charlotte NC