
Microwave Fuse Replacement: A Step-by-Step | Guide for DIY Repair
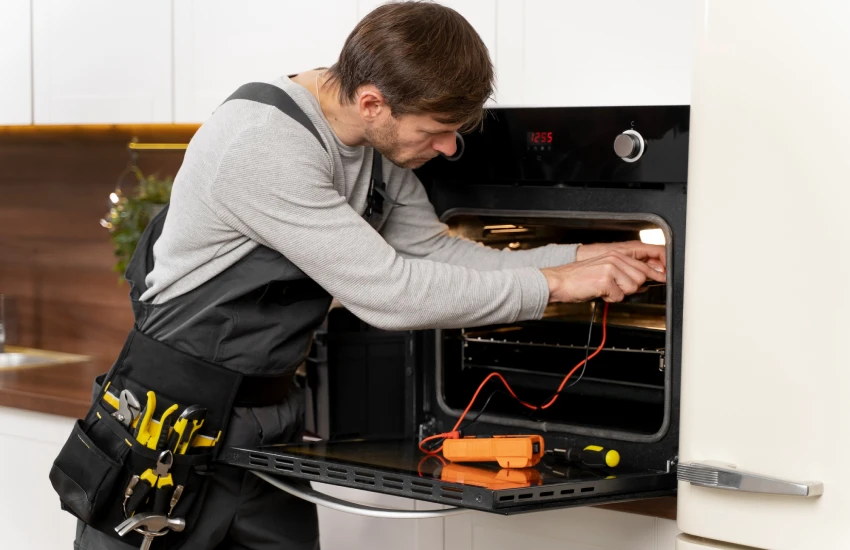
This guide provides a comprehensive walkthrough for replacing blown microwave fuses. Know about the importance of microwave fuses, essential safety precautions, and a detailed step-by-step process for diagnosis and replacement. Additionally, discover when it’s time to call a professional and how to prevent future fuse issues.
Microwave Fuse Replacement: A Step-by-Step Guide for DIY Repair
Understanding Microwave Fuses: The Unsung Heroes of Kitchen Appliances
Imagine this: You’re about to heat last night’s leftovers, but your microwave refuses to cooperate. No hum, no light, no rotating plate – just an eerie silence. Chances are, you’re facing a blown fuse. Well, this guide will illuminate the mysterious world of microwave fuses and empower you to tackle this common problem head-on.
Microwave fuses are the silent guardians of your kitchen, protecting your appliance from electrical overloads and potential fires. They’re designed to fail safely, sacrificing themselves to save your microwave from more serious damage. But when they go, your microwave goes with them – at least temporarily.
Your fridge is a kitchen superstar as it keeps all your food fresh and drinks cold.
But does the fridge feel warm when you open it?
Is there water all over the floor?
Fridge issues are the worst!
Safety First: Precautions Before You Start
Before we dive into the nitty-gritty of fuse replacement, let’s talk safety. Remember, we’re dealing with an appliance that can generate enough energy to cook food in minutes. Respect that power!
- Unplug your microwave and wait at least 5 minutes. This allows the high-voltage capacitor to discharge, reducing the risk of electric shock.
- Channel your inner electrician and don rubber-soled shoes and insulated gloves for extra protection.
- Remove all jewelry and watches. You don’t want to accidentally conduct electricity through your favorite accessories!
Locating the Fuse in Your Microwave: A Treasure Hunt
Now, the fun begins! Locating your microwave’s fuse can feel like a treasure hunt. Common hiding spots include:
- Behind the control panel
- Under the vent grille
- On the top or side of the microwave
Pro tip: Consult your microwave’s user manual for the exact location. If you’ve misplaced it, most manufacturers offer online versions.
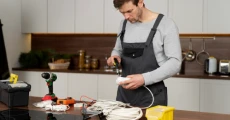
Tools You’ll Need for the Job
Gather your tools, intrepid repairer! You’ll need:
- A screwdriver (typically Phillips head)
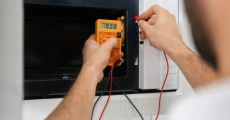
- A multimeter
- A fuse puller or modified paper clip
- And of course, a replacement fuse
Step-by-Step Fuse Replacement Guide: Your Path to Microwave Mastery
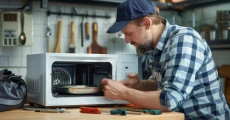
Access the Fuse:
Carefully remove any panels covering the fuse. You might need to uninstall the microwave entirely – a perfect opportunity to clean those hard-to-reach spots!
Extract the Suspect:
Using your fuse puller or MacGyvered paper clip, gently remove the fuse from its holder.
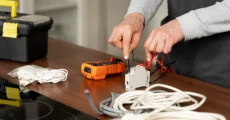
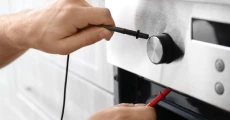
Interrogate the Culprit:
Time to play detective! Set your multimeter to continuity mode or the lowest Ohm setting. Touch the probes to each end of the fuse. No beep or change in resistance? You’ve caught your blown fuse red-handed!
Introduce the Replacement:
Purchase an exact replacement fuse with the same amperage rating (typically 15 or 20 amps for microwaves). Slide it into the holder, ensuring a snug fit.
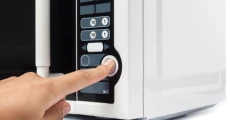
Reassemble and Test:
Replace any panels you removed, plug in your microwave, and test it out. If all goes well, you’ll hear that familiar hum once again!
Testing Your Microwave After Repair: The Moment of Truth
Heat a cup of water for a minute. If it warms up without any strange noises or smells congratulations! You’ve successfully performed microwave surgery.
Preventing Future Fuse Problems: An Ounce of Prevention
To keep your microwave humming along happily:
- Avoid overloading the circuit
- Keep the microwave clean and free from food debris
- Never run the microwave empty
- Check the door seal regularly for damage
By following these tips, you’ll reduce the likelihood of future fuse failures and extend the life of your trusty microwave.

When to Obtain Expert Guidance?
While replacing a fuse is often a straightforward task, there are times when it’s best to call in the cavalry. If you encounter any of the following, you should get in touch with the specialists at CLT Appliance for microwave repair charlotte nc:
- Multiple blown fuses
- Signs of burning or melting
- Unusual odors
- Continued malfunction after fuse replacement
Remember, safety first! Our expert technicians are always ready to tackle even the most perplexing microwave mysteries.
FAQs
Signs of a blown microwave fuse include the microwave not turning on, no lights or display, or a complete lack of function. You can confirm this by testing the fuse with a multimeter set to continuity mode.
No, you must use an exact replacement fuse with the same amperage rating as the original. Using the wrong fuse can be dangerous and may damage your microwave.
Microwave fuses don’t need regular replacement. They only blow when there’s an electrical issue. If you’re replacing fuses frequently, there may be an underlying problem that needs professional attention.
While it’s possible to replace a microwave fuse yourself, it can be dangerous if you’re inexperienced with electrical repairs. Always follow safety precautions and consider calling a professional if you’re unsure.
Repeated fuse blowouts could indicate a more serious issue, such as a faulty door switch, damaged wiring, or a malfunctioning magnetron. In these cases, it’s best to consult a professional appliance repair service.
Don't let a malfunctioning Microwave disrupt your daily life. Contact CLT Appliance Repair today at 704-606-9043 to schedule your oven repair service.
We'll have your Microwave back to optimal performance in no time!
Freezer Repair Indian Land SC | Freezer Repair Indian Trail NC | Freezer Repair Pineville NC | Freezer Repair Rock Hill SC | Freezer Repair Belmont NC | Freezer Repair Matthews NC | Freezer Repair Lancaster SC | Freezer Repair Cornelius NC | Freezer Repair Fort Mill SC | Freezer Repair Concord NC | Freezer Repair Denver NC | Freezer Repair Monroe NC | Freezer Repair Mooresville NC | Freezer Repair Harrisburg NC | Freezer Repair Lake Wylie SC | Freezer Repair Huntersville NC | Freezer Repair Kannapolis NC | Freezer Repair Mint Hill NC | Freezer Repair Waxhaw NC | Freezer Repair Troutman NC | Freezer Repair Davidson NC | Freezer Repair Gastonia NC | Freezer Repair Charlotte NC
