
Dryer Sensor Woes? Expert Solutions for Common Problems
Your dryer runs for an hour, beeps like it is done, and the clothes come out damp. Or the opposite happens: it keeps spinning long after everything is bone dry, wasting electricity and beating up your fabrics. Both problems usually point to the same part. The moisture sensor inside your dryer controls when “auto dry” cycles stop, and when that sensor is dirty, coated, or failing, the dryer loses its ability to judge when clothes are actually dry. The fix is often a five-minute cleaning job. Sometimes the sensor needs replacing.
Your fridge is a kitchen superstar as it keeps all your food fresh and drinks cold.
But does the fridge feel warm when you open it?
Is there water all over the floor?
Fridge issues are the worst!
How Dryer Sensors Work
Modern dryers use two types of sensors to manage drying cycles. Understanding what each one does makes troubleshooting faster.
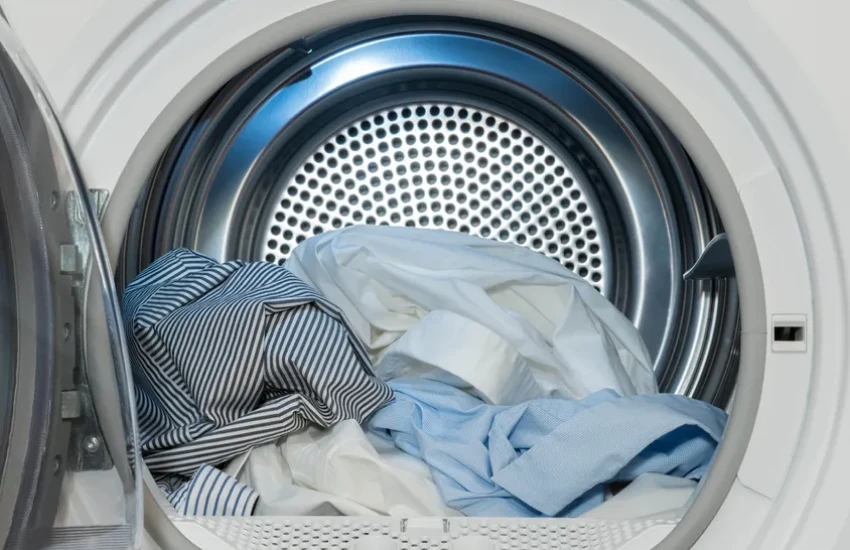
- Moisture sensors are the two metal bars mounted inside the drum, usually near the lint filter. As wet clothes tumble and touch the bars, they complete a small electrical circuit. When the clothes stop conducting moisture between the bars, the dryer reads them as dry and ends the cycle.
- Temperature sensors (thermistors) monitor the exhaust air temperature and work alongside the moisture sensor to prevent overheating. If the exhaust stays hot for too long, the dryer adjusts or shuts down to protect the clothes and the machine.
Every “auto dry” cycle depends on accurate readings from both sensors. When either one gives bad data, the dryer either quits too early or runs too long.
What Sensor Problems Look Like
Sensor issues show up as specific patterns in how the dryer behaves. Recognizing the pattern tells you where to start:
- Clothes still damp when the cycle ends means the sensor is reading “dry” too soon, usually because residue on the bars is blocking proper contact.
- Clothes over dried and hot to the touch mean the sensor is not registering moisture at all, so the dryer runs on time instead of reading.
- Dryer stuck on “Sensing” for a long time before the cycle actually starts suggests the sensor is struggling to get a baseline reading.
- Cycle times that keep getting longer over weeks or months point to gradual sensor degradation or buildup.
- Error codes on the display related to sensor faults or temperature readings that do not match expected ranges.
Diagnosing the Problem
Before assuming the sensor is bad, rule out the simpler causes that create identical symptoms.
Quick Eliminations
Check the vent first
A clogged dryer vent restricts airflow and traps moisture inside the drum. Disconnect the vent hose from the back of the dryer and look for lint buildup. Run a short cycle with the vent disconnected. If clothes dry properly, the vent was the problem, not the sensor.
Check the load
An overloaded drum or a mix of heavy towels and lightweight shirts confuses the sensor because wet heavy items keep touching the bars while lighter items are already dry. The dryer reads conflicting signals and either stops too early or runs too long.
Check the heat
If the dryer is not producing heat at all, clothes will stay damp regardless of what the sensor reads. Hold your hand near the exhaust vent while the dryer runs. If the air is not hot, the issue is the heating element, gas igniter, or thermostat, not the sensor.
Testing the Sensor Directly
Once you have ruled out vents, load, and heat, test the sensor itself. Locate the two metal bars inside the drum. They are usually smooth, slightly raised strips near the lint filter housing.
Visual Check
Look for a dull, waxy film on the bars. Dryer sheet residue and fabric softener buildup coat the sensor surface over time, insulating it from making proper contact with wet fabric. Corrosion or discoloration also indicates a problem.
Wet Cloth Test
Dampen a cloth and press it firmly across both bars while the dryer is running on an auto dry cycle. The display should respond by showing a moisture reading, or the cycle should continue running. If nothing changes, the sensor is not responding.
Multimeter Test
Unplug the dryer, access the sensor wiring from behind the drum panel, and test for continuity across the sensor terminals. No continuity means the sensor has failed and needs replacement.
Fixing It Yourself
Most dryer sensor issues can be resolved at home with basic tools and a little patience. Start with the simplest fix before moving to a full replacement.
Cleaning the Sensor
Most dryer sensor problems are caused by buildup, not hardware failure. Cleaning takes five minutes and solves the issue about 80% of the time. Unplug the dryer, dampen a cloth with rubbing alcohol, and wipe both sensor bars firmly. For stubborn buildup, buff gently with 400-grit sandpaper until the metal looks shiny. Plug the dryer back in and run a test load on auto dry. If the cycle ends correctly, the problem is solved.
Replacing the Sensor
If cleaning doesn’t help, the sensor needs to be replaced. Order the part using your dryer’s model number, found on the label inside the door frame.
Disconnect the wiring harness, remove the screws, and pull the old sensor out. Install the new one in the same position and reassemble the panel. Run a test cycle to confirm it works. Some models need a reset after replacement, so check your manual.
CLT Appliance Repair carries replacement moisture sensors for most major dryer brands. If the cleaning did not solve it and you would rather have someone handle the swap, our dryer repair team across Charlotte can test and replace the sensor in a single visit.
Problems That Look Like Sensor Failures But Are Not
Before spending money on a new sensor, make sure the real cause is not hiding somewhere else in the dryer:
- A clogged lint filter or exhaust vent that traps moisture and extends drying times, regardless of sensor accuracy
- Worn drum seals that let cool air leak in and throw off temperature readings
- A failing heating element or gas igniter that reduces heat output, so clothes never fully dry
- A faulty control board that misreads sensor data even when the sensor itself is functioning correctly
Each of these creates symptoms that feel exactly like a bad sensor but require a completely different fix.
Keeping Sensors Accurate Long Term
A few maintenance habits keep sensor problems from coming back:
- Clean the sensor bars with rubbing alcohol every two to three months
- Clean the lint filter after every single load
- Check and clean the exhaust vent at least once a year
- Reduce dryer sheet use or switch to wool dryer balls, which do not leave waxy residue on the sensor surface
- Avoid overloading so clothes tumble freely and contact the sensor bars evenly
When to Call a Professional
Some dryer sensor situations go beyond what cleaning and a part swap can fix. Call CLT Appliance Repair when:
- The sensor tests fine, but the dryer still misbehaves after cleaning and replacement, which usually points to the control board or internal wiring
- Error codes keep returning after clearing them
- The dryer trips the breaker or produces a burning smell during operation
- You are not comfortable accessing the wiring or pulling the dryer apart


Conclusion
Most dryer sensor problems come down to a dirty sensor bar that needs a five-minute wipe with rubbing alcohol. When cleaning does not fix it, a multimeter test confirms whether the sensor has failed and needs replacing. Everything beyond that, control boards, wiring faults, and repeated error codes, is where professional help saves time and prevents guesswork.
We see dryer sensor calls regularly at CLT Appliance Repair, and the pattern is almost always the same: a quick clean fixes it, or the sensor gets swapped, and the dryer runs like new. Either way, we test it before we leave and make sure the auto dry cycle actually stops when it should. Charlotte homeowners who are tired of pulling damp clothes out of a “finished” dryer know where to find us.
FAQs
The moisture sensor is usually dirty or coated with fabric softener residue. Cleaning the sensor bars and checking the vent for blockages usually restores normal drying.
Clean the sensor bars with rubbing alcohol, run a test cycle, and if the problem persists, test the sensor with a multimeter and replace it if it shows no response.
Yes, but they leave a waxy coating on the bars over time. Clean the sensors regularly or switch to dryer balls if you notice inaccurate drying.
Call a technician if cleaning and basic checks do not fix the issue, your dryer shuts off within a few minutes repeatedly, or you suspect wiring, control board faults, or other electrical problems.
Don't let a malfunctioning dryer disrupt your daily life. Contact CLT Appliance Repair 704-606-9043 to schedule your dryer repair service.
We'll have your dryer back to optimal performance in no time!
Dryer Repair Indian Land SC | Dryer Repair Indian Trails NC | Dryer Repair Pineville NC | Dryer Repair Rock Hill SC | Dryer Repair Belmont NC | Dryer Repair Matthews NC | Dryer Repair Lancaster SC | Dryer Repair Cornelius NC | Dryer Repair Fort Mill SC | Dryer Repair Concord NC | Dryer Repair Denver NC | Dryer Repair Monroe NC | Dryer Repair Mooresville NC | Dryer Repair Harrisburg NC | Dryer Repair Lake Wylie SC | Dryer Repair Huntersville NC | Dryer Repair Kannapolis NC | Dryer Repair Mint Hill NC | Dryer Repair Waxhaw NC | Dryer Repair Troutman NC | Dryer Repair Davidson NC | Dryer Repair Gastonia NC | Dryer Repair Charlotte NC